Are you looking for a complete guide how to install home solar panels? Are you considering getting solar panels for your house to use clean energy and lower your power bill? This guide will show you very carefully how to put up solar panels on your house, from planning the project to turning on the power to the system.
Things to think about before putting up solar panels:
- Look at your electricity bill:
Before you start installing solar panels, you need to know how much energy you’re already using. Look at your power bills to get an idea of how many kilowatt-hours (kWh) you use each month. Based on this knowledge, you can figure out what size solar energy system you’ll need.
- Find out the size of the solar system:
Once you know how much energy you use, you can figure out what size solar system you need. Think about how many hours a day all the electrical tools you want to use will be on and their wattage.
- Make a list of the things you need:
Make a list of all the solar energy system parts you’ll need. This usually comes with solar PV panels, a charge controller, AC and DC wires, a solar mounting structure, an inverter, a lightning arrestor, earthing cables, MC4 connectors, and a battery (if you want an off-grid system).
- Get your space ready:
Make sure that the place where you want to put the solar panels gets a lot of sunlight during the day before you install them. Cut back any trees that hang over the panels or get rid of anything that might be in the way of the light.
- Pick a solar panel seller:
Pick a reputable solar panel business, like Black Sun Roofing and Solar, to provide and set up your panels. Think about things like the different types of solar panels that are out there, how much they cost, the different types of warranties that are available, and how they can be customized to fit your needs.
- Do a study of the technical aspects and viability:
Before installation, look at the construction of your building, the size of your roof, and how much energy it uses. Think about things like the size of the house, the number of people living there, and the amount of sunlight that hits it.
- Making a budget:
Figure out how much it will cost to put solar panels by figuring out how much energy you use and what equipment you will need. Costs like inverter capacity, earthing, battery storage (if needed), guarantees, maintenance, and the number of panels you need to reach your energy goals should also be thought about.
- Connect to the grid:
Choose whether you want your solar system to connect to the power grid (an “on-grid” system) or work without it (an “off-grid” system). The type of transformer and battery storage you’ll need will depend on what you choose.
- Get grants and permits:
Once you’re sure of your installation plan, get the permits you need to make the installation legal. Also, look into any grants or other benefits that might be available in your area for installing solar panels.
How to Install a Solar Panel Step by Step:
How to Put Up Solar Panels at Home in 3 Easy Steps – This guide breaks down the process of installing solar panels into simple steps that are easy to follow. Step by step, let’s learn how to put up solar panels.
- Putting up the structure for placing the solar panel
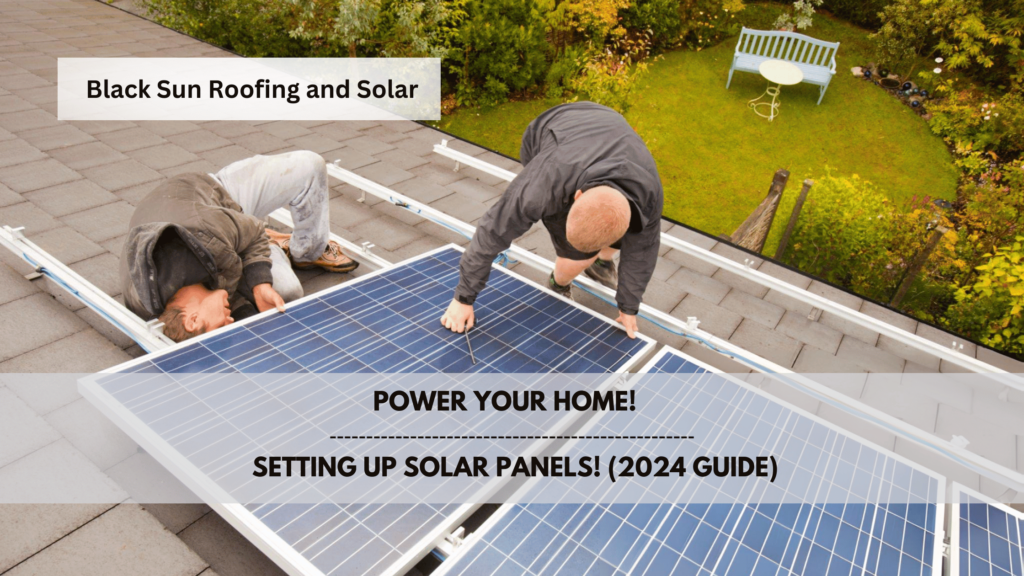
Setting up the frame that will hold the panels is the first step in installing solar panels. To get the most sunlight, the whole mounting system needs to be tilted at an angle of 15 to 20 degrees. For places in the Northern Hemisphere, facing solar panels south is best because that’s where the sun shines the most. So put the structure in the right way.
A railed method is often used for roofs that slope down. Putting up a set of rails on the roof to hold the solar panels is what this is all about. These rails are attached to the roof by cutting holes in it and using sealant to keep water out. Flashings, screws, and bolts are used to hold them in place. With a flat roof, the solar panels are stacked on either ballasts or concrete blocks.
As soon as the frames are properly set up, the racking rails can be put in place. As soon as the day of installation comes, make sure that the solar hanging system matches your plans and drawings.
- Putting up the solar panels
After setting up the mounting frame, you need to attach the solar panels to it. To do this, you need to line up the panels so that the mounting holes line up right with the tracks. The stainless steel nut, bolt, and washer must be used to place the solar modules on the mounting holes on the back. At least four points must be used to lock each Module firmly to the mounting structure.
Because the module frames expand linearly when they get hot, we suggest leaving at least 10 mm of room between each module. The next panel needs to be put on the rails so that the clamps are between the two panels that come after it. Only fixings made of stainless steel should be used. Always choose the length of the fixing screw with 5–10 mm of space between the back face of the module and the screw face. This will keep the module from breaking when the screw is tightened. After that, you need to make the clamps between the pieces tighter.
- How to wire and connect solar panels
All wiring needs to be done according to the rules set by the electrical code authority. MC4 connectors and junction boxes will be used to connect the solar cells in this step. To get the voltage and current flow you want, you can connect panels in series or parallel, depending on how your system is set up.
When you make this connection, the Positive (+) Wire of one PV module is linked to the Negative (–) Wire of another module. This kind of connection makes it easier for the voltage to match the battery bank. While current stays the same.
Positive (+) to Positive (+) and Negative (–) to Negative (–) are the connections that are made in this case. With this kind of wiring, the voltage at each switch stays the same while the current goes up.
Taking temperature changes into account, make sure that the string’s highest output voltage doesn’t go over the inverter’s input voltage. When connecting the wires and terminals, make sure that the polarities are the same. If you don’t, the module could get damaged.
During the construction phase, make sure that the panels are not hooked up to the load. To keep everyone safe, the grid has to be turned off so that no power flows during the installation.
- Hooking up the solar panel setup to the solar inverter:
It’s then time to connect the panels. The positive wire from the solar panel goes to the positive terminal of the inverter, and the negative wire goes to the negative terminal of the inverter. To avoid short circuits, make sure that the positive and negative ends are properly matched.
- Hooking up the battery to the solar generator (for off-grid systems):
You need to connect your off-grid solar power system to a battery so that you can store electricity and use it at night or when the sky is cloudy. The solar inverter should be hooked up to the solar cell. Connect the battery’s positive terminal to the inverter’s positive terminal, and connect the battery’s negative terminal to the inverter’s negative terminal.
- On-grid systems: To connect the solar generator to the power grid, do the following:
Connect the transformer to the main power switchboard to connect your solar system to the power grid. This lets the solar panels send back into the grid any extra energy they make.
- To turn on the inverter:
After everything is hooked up, turn on the solar generator. Check the digital monitor to make sure it’s working right and to see real-time information about how much energy is being made and used.
- Connecting to the earth:
For solar panel systems to be safe, they must be properly earthed. Make sure that the modules, inverters, and the link to the grid all have enough earthing. It is suggested that copper strip earthing be used for better conductivity and longevity.
Excellent work! You are now done setting up your solar panel setup. When you use solar power, you not only lower your carbon footprint, but you also get the benefits of clean energy. If you take good care of and maintain your solar cells, they will keep giving you clean, long-lasting power for many years to come. Welcome the energy of the future, and enjoy the money you save on your bills!
Why Black Sun Roofing and Solar is the best for installing solar panels?
When it comes to installing solar panels in Maryland that you can trust, Black Sun Roofing and Solar is the best company to go with. Black Sun Roofing and Solar is known for being an innovator and leader in the field of green energy. They sell high-quality solar panels that can be used in both homes and businesses. Their dedication to improving technology, durability, and efficiency makes sure that customers get the most out of their solar systems. When you work with Black Sun Roofing and Solar, you can be sure that you’re getting high-quality solar panels that are backed by years of experience and a commitment to the environment.


